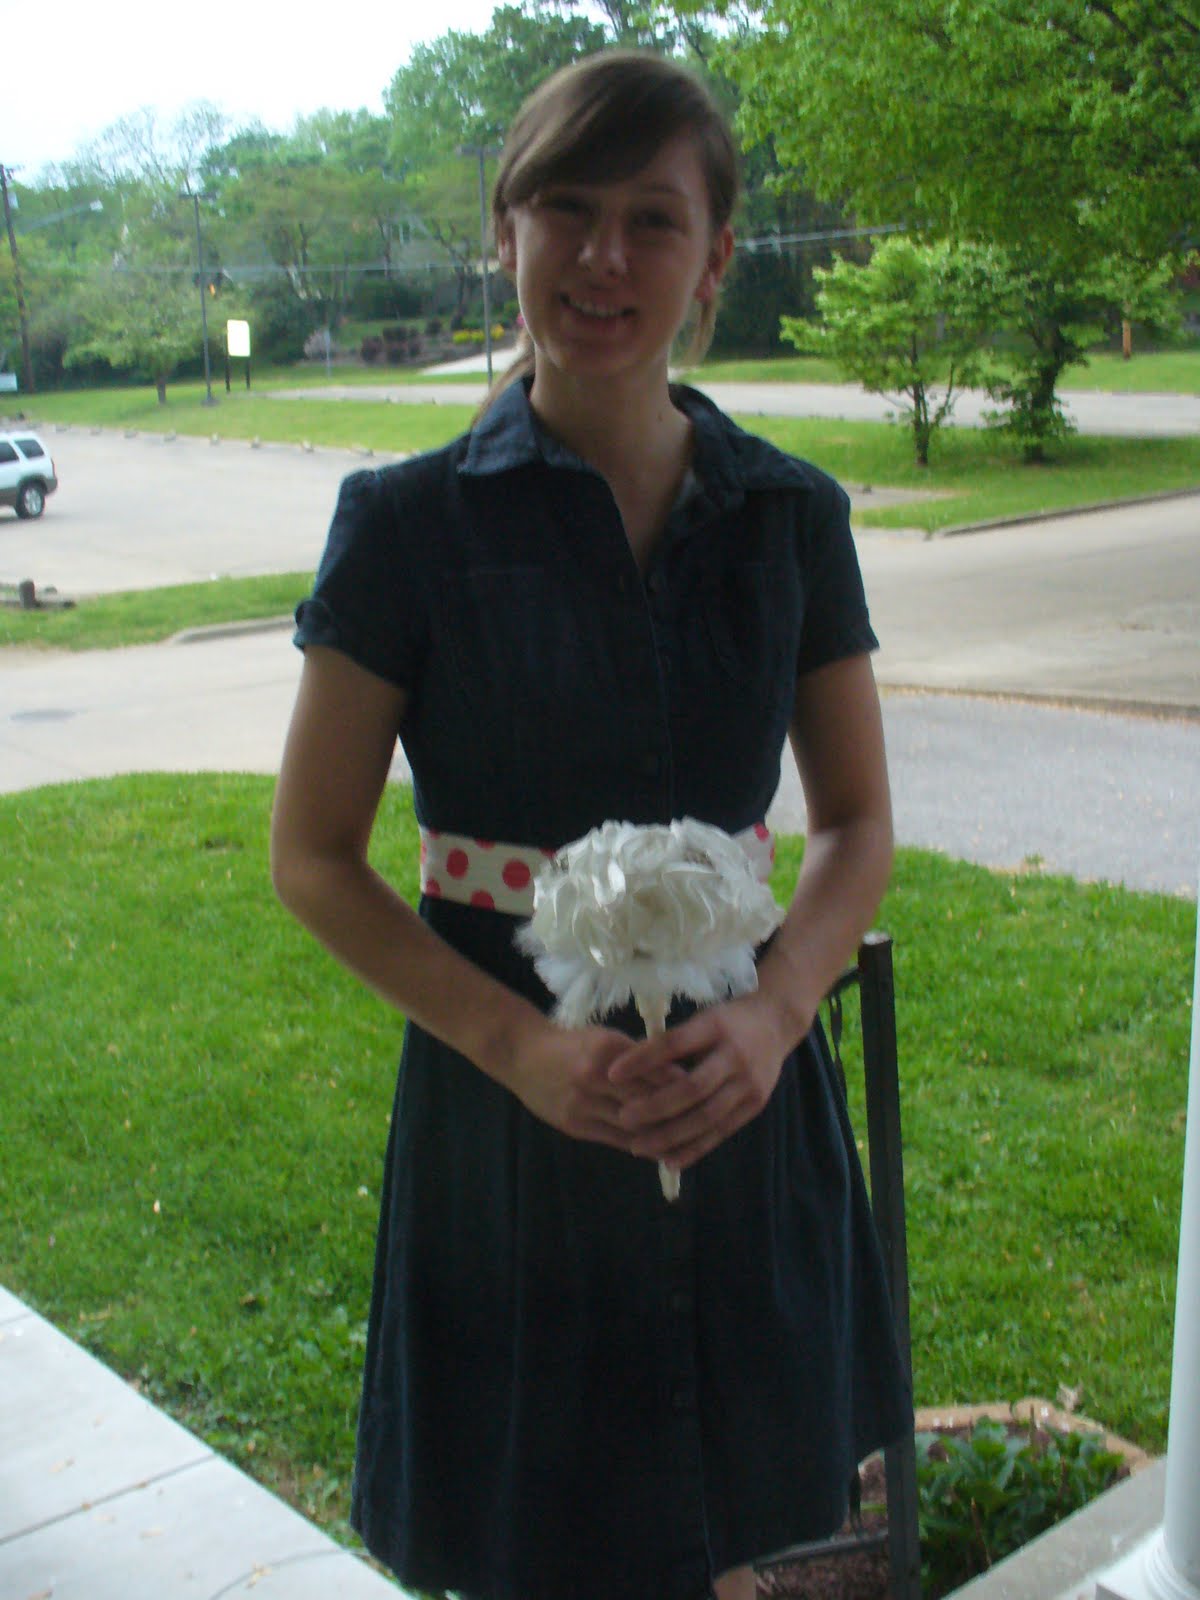
Pages

Showing posts with label DIY. Show all posts

Friday, September 23, 2011

I'm Dumb

So I went to put in a load of laundry and was out of soap. Weird, I thought, I could've sworn I just made it! So I get everything out and start to make a double batch since I ran out so fast. 5 minutes into making the double batch and I see a handful of jugs of laundry soap on the very top shelf in the laundry room. There all along.

So...anyone need laundry detergent? I guess I won't have to make it for a while!

Here's the recipe I use, it has saved me a ton of money-we do stupid amounts of laundry for 2 people!

Homemade Laundry Soap
Grate one third a bar of bar soap (I use Ivory). Dissolve in 6 cups hot water on stove. When dissolved add half cup each Borax and Washing Soda (they had both at WalMart, $2.50 each for big boxes). Add soap mixture to 26 cups hot water (that's 1 gallon plus 10 cups) in 5 gallon bucket. Let cool and store in clean milk jugs or laundry detergent container.

I'm sure I saw this recipe somewhere but its been a bit.

I forgot to add that I use a half a cup per load, and to leave an inch or so of space in your containers because you need to shake it a bit before you use it.


Wednesday, July 13, 2011

To Do List


There are so many projects I want to and a very limited amount of time, with all the summer traveling we've been doing! Courtesy of the blogs and Pinterest, I end up with a year's worth of projects in a week's time.

This is just outrageously pretty. I'm going to start shopping for embroidered pillowcases ASAP. My friend Jodie just had a girl, and I'm starting to think maybe I just need to have a little stock of homemade bibs/receiving blankets/baby paraphernalia since lots of our friends are getting knocked up.


A bed for the dogs needs to be next on my list. We're hoping to transition them from their crate to a bed in our room at night, and we need a bed for them first. All the cushions I've found have been so expensive-like $30/$40! I want something decently sizable so both 17ish lb dogs can cuddle up, so I'd have to up the size of this bed big time.

Seriously, what cat is going to sit on a bed designated by someone other than themselves?


I want this skirt SO BAD. I LOVE the chevron. I have all pencil skirts, and I'm trying for some slightly more full silhouettes, this being an ideal transition. And the chevron pattern? I could wear this to work once a week. My grandma says this would be a good beginning apparel sewing project....I have a tendency to dive into less than simple apparel projects that end badly. No more. I need to start at the bottom. I've conquered an apron, so I feel ready for this skirt.


It's the new Ginger pattern from Colette patterns.

This is a no-brainer project that requires me to only remember to buy magnets, because I already have the dish. Sticking pins into the pin cushion is clearly exhausting, and it would be so much less taxing to hurl the pin into the dish.


So my husband is a classic piler. He has little piles all over the house with vitally important stuff. Maybe if I could have enough storage bins then the piling would be more contained? I just like storage bins. I want one for the dogs stuff, I want a handful for the laundry room, and I want a few for my nightstand. Also for my sewing room. I want lots of these. And one for the guest baths.

Source

This is just super cute.


Source

This is potentially the cleverest bit of embroidery I have ever seen. I want to make throw pillows for our bed then embroider this on them.

Source

Originally stitched by Buitenlander25 via Flickr


Um yeah. Also I'd like to make a quilt for my sister sometime. Then I have a finished quilt top that needs to have a completed backing and then finished up completely.

Someday, I will get to some of this. I'm smack in the middle of a present for my sister, and I'm working on a t-shirt quilt for one of Ryan's cousins. After those 2 things, I am closed for business for a good while so I can catch up on some stuff for myself....I'm really bad at sewing away for other's, but I tend to backburner my own stuff.

What are you working on this summer?

Monday, June 14, 2010

My Bouquet

Yes, I am still harping about the bouquets.

My bouquet is different though than the bridesmaid's bouquets that you've already seen. The bridesmaid's bouquets have 16-18 flowers in them, and mine has 22, so it's bigger. Mine also has more pins, and small feathers are stuck in the top. Oh and mine has an aqua handle while the b-maids have ivory.

Ta da!


The big pin on the handle is my "something borrowed" from a dear friend of the family, Suzanne.


I could stare at these all day. So pretty. I am going to carry this around as much as humanly possible on July 24th.

What's your fav DIY project that you've done or seen?

Thursday, April 29, 2010

So how much?

I thought I'd do a cost break down on the bouquets for you all, so here goes:

Per bouquet (bridesmaids bouquet, 20ish flowers used per bouquet):

1 yard satin fabric, regular price $10/yard, used 40% off coupon, so $6/yard (right?)
20 floral stems, $2 for 75, so $0.54
1 bouquet holder, $2
Half a roll of ivory ribbon, $1
Rhinestone pins (some were gifts, but for most of the bridesmaids I bought rhinestone earrings at thrift stores, had my dad cut off the earring back with a drill thing and then hotglued a pin back on), $1
3 inch ostrich feathers, 5 used, $2.55
Hot glue, thread, pearl-headed pins, maybe $0.50

Total cost for 1 bridesmaid's bouquet: $14.09

HELL YES! Especially since the 6 hydrangea bouquets I originally looked at were going to cost me at least $500 and all of these cost under $100, including my bouquet.

The huge cost of these was elbow grease. Sewing those flowers is more time consuming than I could ever tell you (though trial and error added a good month on to this project), and then you have to sew them to a stem...it took way longer than I thought it would. I can honestly say that at least 5-6 hours was spent per bridesmaid's bouquet, and mine took even longer since mine is bigger and uses more flowers.

Also, the cost of the rhinestone pins could really get crazy, it just depends on how you do it. If you go into an antique store and buy the 100% perfect ones, they can go up to $50 a pin. I got lucky with rhinestone earrings that I then turned in to pins, and I bought them at a thrift store that the antique store crowd tends to stay away from, so that price point might not be realistic if you aren't willing to dig.

I am so, so glad I did these. Out of all the stuff we're doing for the wedding, I am most proud of these. I had almost nothing to go off of but I figured them out (adding to the time involved), and I am beyond thrilled with them.

I'm probably not going to be able to stop myself from shoving my bouquet in people's faces at the wedding while saying "LOOK WHAT I MADE!"

Have you done anything for the wedding that you are crazy proud of or that saved you a ton of money?

I swear I will eventually stop harping about these...at some point that is yet to be determined.

Tuesday, April 27, 2010

They're Done!

The bouquets I have been working on since AUGUST are finished! And they are exactly what I had in my head...it is so exciting to be able to create something and have it match up perfectly with what you had in your head, isn't it?

Alli modeled one for me:


Here's more of a close up:


And the bottom so you can see how I covered that not-especially-attractive bouquet holder. The ribbon wrap is 100% perfect but I think it's definitely close enough.


My bouquet is a touch bigger, and will have an aqua handle wrap. I found the rhinestone pins at thrift stores...a few of them are earrings that my dad used his saw/drill thingy to cut the earring part off, then I hot glued a pin back from Hobby Lobby on and pinned them into the bouquet.

So all 5 bridesmaid's bouquets are done, I'm waiting on feathers for mine. I ordered 3 inch feathers that worked nicely for the smaller bridesmaid's bouquets, but they weren't big enough for mine. I got the feathers for an amazing price from Etsy seller SimplySilverbyHeena. She's awesome, so if you need feathers check her out!

I am so thrilled with these, I can't wait to see how they look with my dress!

Want to make your own?

Here's the inspiration for my bouquet, and here's how I made the satin flowers. This is how I shaped the bouquet.

Don't want to make your own because it takes an obnoxiously lengthy amount of time? E-mail me, we'll talk!

So what do you think ladies? Don't they look 1000000x better than this attempt!

Friday, April 23, 2010

Corsages

Since I did the bouquets on my own (they are DONE you all, I cannot WAIT to show them to you!) and Ryan has an extreme dislike of boutonnieres (yes, wedding planning has taught me how to spell that word...we've obviously been engaged for too long), it didn't make much sense to employ a florist for a few corsages, one for Ryan's mom, one for my mom, and one for my grandma. Oh and one for my mom's best friend who is mom #2. So I decided to make them. This was actually one of the very first wedding decisions I stuck to and I never once changed my mind, which I find impressive considering my track record.

Anyway, I made the 4 corsages out of organza flowers. I did a tutorial of them here. I also used these flowers in my toss bouquet.

I used pearl beads in the center because I figured they would match pretty much anything the ladies decide to wear. Here's my sister Allison modeling one:


She should skip grad school and go into hand modeling, what do you think?

Fuzzy close up:


I wanted to give the ladies options on how to wear them, so I bought pin backs from Hobby Lobby. They were in the beading aisle and were maybe $1 for 50 or so. I hot glued 2 ivory ribbons cut on a slant so they wouldn't fray on the back of the corsage and hot glued the pin back on top of that.


This way, the corsage can be worn pinned on a dress/jacket or tied on the wrist. I felt super clever until I realized that if they wear them on their wrist, the pin back might be annoying. I tried it on though and it didn't bother me, and Alli said it didn't bother her either so I'm going to go with "it works" on this one and leave it at that! I'm also going to equip the guest book attendants with scissors, so if the corsages are pinned on then the ribbons can be cut off.

Super cheap project, and I already had the flowers made, so it took 10 minutes for all 4! I think they are really pretty, too, and will make a nice keepsake.

Are you doing corsages for the ladies in your life?

Have a lovely weekend...Ryan's coming down tonight, my friend Melissa is coming over for dinner AND the printers just called and said the proof of the invites is ready!

Wednesday, April 14, 2010

Project-less

The bouquets are done (except for mine, but once I get the feathers in, that's a 10 minute deal), the handkerchiefs are done, the corsages are done, the bags for the bridesmaids are done....all I really have left to do on the DIY front is the table overlays for the reception and adding ribbon to the cardbox (and um, post that stuff that I haven't yet...my camera broke so now I have to harass Alli, so taking pictures is a slower process). Neither challenging or time intensive, as they mainly employ copious amounts of glue.


This should be great news! I have a pattern for a dress I want to make for my sister Alli, and I have a stack of things I want to make apparel-wise for myself, such as this obi-style skirt. But sewing clothes scares the crap out of me, as I fear messing up...even though I know with sewing that messing up in inevitable. It will happen, it's simply a matter of when and how badly. That's why I love doing a mock-up first out of fabric that doesn't cost lots. So I need to give myself a serious pep talk and get to it.

Honestly, making all of the things that I've made for this wedding has been so much more satisfying then I thought possible. Seeing something outrageously expensive or beautiful that I love and then recreating it myself, sans directions in many cases, feels so good! Knowing that so many personal touches are headed in the direction of people I care very much about makes me happy. And I am really proud of myself for doing all that I've done DIY wise, because it turns out that I really enjoy it and the stuff I've done has turned out better than I could have hoped. Who knew, right?

But I'm a bit sad that I'm out of projects at the moment. I think I need to put my big-girl pants on and stop being a pansy about the scary sewing patterns.

Are you done with your projects, or are you just beginning? Were you slightly sad that they were over?

Thursday, April 8, 2010

Toss

My sister and maid of honor Alli was nice enough to put together a toss bouquet for me last weekend, since there is no way in hell I am tossing the satin flower bouquet I have slaved (I mean labored over with love) (they're almost done by the way, I'm just waiting for some feathers I ordered off Etsy to arrive!). I had a bunch of flowers laying around from before I really figured out exactly what I wanted for my bouquets, and I figured these would make a nice toss bouquet. (Want to make these super easy organza flowers for yourself? Here's a tutorial!)

The flowers were conveniently already sewn onto stems, so Alli just arranged them into a bouquet-ish shape, wrapped the stems in floral tape, and then did a ribbon wrap with some Martha Stewart ribbon we got at Big Lots for $1. Alli is a perfectionist and she is bothered that so much of the stem is showing...but I think it looks fab.


My room is such a mess, I'm sorry you have to look at it....and I've set up a sewing area on my desk, and when you sew you have to press things all the time, so I drug the ironing board and iron up from the basement and I just keep it in my room now. Classy. Also I've been in St. Louis for the past 3 weekends and cleaning is high on my priority list for the weekend.


Simple, easy, pretty, and thanks to Alli, DONE. These organza flowers took so little time and they were just sitting around going to waster, so I'm glad we could use them.

I have more organza flowers that are not sewn on to stems and I'm going to use them for pins/corsages for the moms and grandma. I'm going to glue a pin onto the back and sew ribbons onto the back, so the ladies can wear them as a pin or as a corsage...and if they pick the pin option then they can just cut the ribbons off. I do want to put pearls in the middle of the ones the moms/grandma will be wearing instead of the aqua or red beads, I think there's a higher chance of it matching better.

Can you bear to toss your bouquet or are you doing a separate toss bouquet? What are you doing corsage-wise for the women in your life?

Wednesday, April 7, 2010

Dads and Grandpa

My dad has carried a handkerchief as long as I can remember. If we skinned our knees or had a runny nose when we were little, the handkerchief was there. When I got a little older I'd embroider dad a set for Christmas or his birthday, so I knew I wanted to do something special for the wedding. Ryan's dad occasionally carries a handkerchief and Ryan mentioned that his grandpa would like one as well.

I bought a set of 3 Charter Club handkerchiefs at Macy's for $10, and I bought red and aqua embroidery thread at Hobby Lobby for $2. I could've gotten away with way less thread, too, since embroidery thread has 6 strands in it and I separated it to use 2. So one piece of thread could go 3 times as long (the stitches were thick and sloppy looking with all 6 strands, 2 definitely looked the best).

I typed up the words I wanted in the font we used for our invites. It's called Tagettes and I downloaded it for free from DaFont.com. After washing, drying and ironing the handkerchiefs, I traced over the typed up words in with a pencil so I'd have something to go from.

After that I just used a simple outline stitch, and that was it, really. I got all 3 done in 3 days, it took about 1-1.5 per handkerchief. (Here's a good tutorial on stitches, the one I used for these was an outline stitch).

Anyway, here's the one I made for Ryan's grandpa:


And I made 2 of this one, one for Ryan's dad and one for my dad.


I am thrilled with how they turned out. They are not perfect, but I love that they don't look machine stitched, they look handmaid. I hope the dads and grandpa like them as much as I do!

Also I really miss having these to work on already...anyone need any embroidery done? I can really only do the cross stitch and outline stitch!

Does your dad carry a handkerchief?

Tuesday, April 6, 2010

Oooo la la!

I sewed my garter...months ago and I'm just now getting around to blogging it. Oops!

Future Hubs: Please vacate the premises immediately.


So Ryan and a bunch of his runner friends are on this running team they call "Omega Falcon" and their colors are royal blue and orange. Since almost all of the Omega Falcon runners will be in attendance at the wedding, I had to the garter in those colors, right? Right. But I have love in my heart for dotted swiss, and the challenge was to mix that girly fabric with the sporty colors. I found some dotted swiss tulle at Hobby Lobby for the low low price of $4 a yard and picked up 1/4 of a yard for almost nothing. The ribbon I also got at Hob Lob when it was half off for like $1.

Ta da! Please ignore how pasty my legs are.


Making this was super unscientific and very much a trial-and-error process. I basically cut material in rectangles and sewed it to a piece of elastic until I got what I wanted. The piece of tulle is much longer that the elastic, and when I sewed the 2 pieces together I stretched the elastic out with 1 hand while sewing, so when I was done sewing the elastic contracted and gave the tulle that nice gather.

It's nothing fancy by any means, but it'll do. I keep seeing other garters on the blogosphere that I want to attempt (like this one), but I think I just need to let this project be. My friend Melissa did mention that she might have me sew her garter, which opens that realm of exploration back up!

Did you ever finish a project and were then tempted to do it all over thanks to too-much-inspiration?

Tuesday, March 23, 2010

Patting myself on the back...

Because I successfully completed some bridesmaid's bags...and I have never seen more beautiful tote bags in all of my life. I am making some for myself after I get all of the ones for the girls out of the way! I am tempted to take a page out of the Selfish Seamstress's book....

I'm going to be obnoxious and show off...here's a completed bridesmaid's bag:


I really like how structured the bag is, it looks really nice and tailored in real life. Once I got the hang of it, the other bags have been going so, so fast. I have 3 100% done and 2 more that just need the handles sewn on and the sides structured. I thought this project would take me forever but that hasn't been the case at all.

I do want to give the bridesmaid's something in addition to these bags, but I'm kind of stuck. The only thing I can think of is a vintage rhinestone pin. I want to give them something they'll really use and love. What are you all giving your bridesmaid's, any ideas for me?

Wednesday, February 24, 2010

Misc.

Have you guys entered the giveaway I'm hosting right now? I am so, so excited about it, and kind of peeved that Ryan and I aren't having a ring bearer...or I would enter it myself! Also, my aunt sent me the link to their look book, check it out here.

So I've been up to quite a bit lately, I just haven't bothered to tell you all about it! I'm chalking it up to spring fever...I'm so restless...I want the wedding to come tomorrow but then I don't at the same time (that would be quite the all nighter!).

The bouquets are all sewn and put together, they just need finishing touches to cover up the not-particularly-attractive bouquet holders and the stems.


I started working on the table overlays, realized how crooked they looked, set them aside, realized I might be being slightly OCD about that and then never started on them again. I keep meaning to show them to Ryan and see what he thinks but the whole we-live-in-separate-cities thing keeps getting in the way.

I've started on the bridesmaid's tote bags, and I can't wait to post about them! I am really excited about the fabric I ended up with.

Basically, these are all projects I've started and lost steam on and need to finish. Finishing something would make my month, so I need to just do it.

Do you have a tendency to start things and then not finish them? Any half-finished projects on your list?

Wednesday, February 3, 2010

No more...

I am sick and tired of sewing satin flowers for the bouquets.

I only need to sew 30 more, I'm in the home stretch. I've got it down to a science, with each flower taking 3-4 minutes. But I don't even want to look at the unfinished flowers, I prefer to stare dreamily at the bouquets I already have put together that only await feathers and ribbon.

But I want these done. I want them 100% completed and safely stored until July. I want to cross this off my list so badly. (I'm not goal oriented, or anything). So I've broken this task up: I am going to sew 5 flowers a night for the next 6 nights, and I will be finished. Then I just have to sew them onto stems, but I'll think about that part later. "Tomorrow is another day..."

This is something I never thought I'd be saying, but the ivory feathers I bought to cover the white plastic bouquet holders are too yellowy, so I went back to get white feathers. For some reason the white feathers are droopier and thus unusable. So I am on the hunt for white ostrich plumes, I'll keep you posted. If you would have told me a year ago that I would find a certain color of feathers too droopy for use, I would have laughed at you. It sounds ridiculous to me too, but they really are too droopy, I swear!

Are you in the home stretch of any DIY projects?

Wednesday, January 27, 2010

Under Construction

The bouquets have been really simple to put together! I picked up these not-especially-attractive bouquet holders from Hobby Lobby for $1.99 a piece. I went with the smallest size they had for the bridesmaid's bouquets, and the holder we're using for my bouquet is just a bit larger.

First I cut down the tulle. It was too much, so I trimmed about an inch off. I am not crazy about the fringe of material, but you can hardly see it when the bouquet is done.


Then I cut off the frou-frou plastic thing, because I want as little of these holders showing as possible.


Then you stick the flowers in! I doubled up the stems because they were way too long.


Not a particularly scientific process. Here are the ones we have done so far:


4 down, 2 to go! My bouquet is on the far left.

Next, we need feathers to hide the bouquet holder, and then the stems need to be wrapped in floral tape and then ribbon. So they are 95% done! These have turned out so much better than I ever thought they would, I am so proud of them. I tried to make these with cotton for the flowers, but dressier materials such as satin just look so much better, in my opinion. These would be gorgeous in velvet for a winter wedding, I think!

What DIY project are you most proud of?

Tuesday, January 26, 2010

Tutorial: Satin Flowers How-To

So the 2 flower tutorials I've done before are on the misleading side...because I haven't used either one of the those flowers in the bouquets I've been putting together. They just weren't matching up to the image I had in my head, so I played around with them and came up with these. Here is how to make the flowers I've been using in my satin flower bouquets.


Cut a piece of material, a rectangle. Look how crooked mine is--cutting a straight line is not a prerequisite, trust me! The fatter your material, the wider your flower will be. The longer your material, the tighter wound it will be. Mine is about 2.5 inches wide and 7 inches long, give or take.

Fold the material in half lengthwise, so you have a long rectangle. Fold the wrong sides of the fabric together so the right sides of your fabric are on the outside.

Thread your needle with coordinating thread, and knot it at the end. Pull your needle and thread up and through both layers of fabric. Sew long stitches all along the top of the rectangle, with the folded edge at the bottom. You want to sew the 2 frayed edges together, so you should be sewing closest to the frayed edges.


Take big stitches. Mine are at least 3/4 of an inch. If you sew little stitches your fabric is going to be way too gathered. You only want a loose gather, so take big honking stitches.


When you get to the end of the line, cut your thread, leaving about 2 inches to give you something to work with. Do not knot your thread or anything, it's supposed to be unsecured.


Gently pull on the loose thread you just cut to loosely gather your material. I found, through lots of trail and error (mostly error) that a really loose gather works the best and gives the best shape for the flowers.


Once you have the fabric gathered to your liking, start to loosely roll the fabric. I always try to keep the frayed edges even with each other when I'm rolling the material, to keep the flower consistent.


After you roll up your loosely gather rectangle, you should have something like this. This process is not even remotely scientific...if you used a bigger piece of material or gathered the material more tightly it will look a little different, but this is the basic idea.


Before I start gathering the material, I thread my needle and knot my thread so I'm ready for this step. I gather the flower at the bottom and sew through the layers of material at the bottom to secure the material. This part doesn't show in my bouquet, so I'm usually messy about it. I also fold down the fraying edges in the center of the flower and on the edge and sew them down, so I don't have any frayed edges poking up.

I've been using normal floral stems from Hobby Lobby, in the heaviest gauge they have. I fold it over and a bit and sew it on to the flower like this:


Ta da!

Tomorrow I'll show you how I've been constructing the bouquets using these flowers.

If any part of this is unclear, or if you have any questions at all, please let me know, I'm happy to help! This is really such an easy project, and it is so forgiving of mistakes.

Friday, January 22, 2010

Gifts

I don't think I mentioned that I just asked my friend Melissa a few days ago to be a bridesmaid, but I did and I am super excited!

--Attention lovely ladies who are standing up with me July 24th: This post discusses what I am thinking about giving you as a gift. If you like surprises then I would suggest stopping now. Melissa and Alli, this is not news to you, so disregard.--

I now have 5 bridesmaids gifts to get together, but I think I have some ideas that will do nicely. Remember for Christmas my mom gave me that One Yard Wonders sewing book? In the book there are directions to make cloth tote bags that are nicely lined and have a pocket. There are also directions to make these really cute envelope pouches (literally like a cloth padded envelope with a button or a ribbon to close it). I thought that making each girl a bag and a pouch would be great for bridesmaid's gifts. I want to make each girl a bag and a pouch and have the bag and pouch coordinate, but get everyone a different pattern/color scheme. I'm also thinking (depending on the fabric) about embroidering their initial on the bag.

Have you seen how cute fabric is nowadays?


It's an Alexander Henry print from his Lorenza collection, and it's $8.95 a yard. A bit high, but I don't need much yardage for these projects, 1.75 yards max (I am way, way overestimating) per set of pouch and bag.


I should probably save that fabric for baby gifts, but I love it.


My sister Alli is loving that coral color right now, this would be great for her.


Melissa is getting married in November, and her colors are sage green, chocolate brown and champagne. I thought it'd be cute to make her stuff in her wedding colors and then she could use the bag to carry essentials on her wedding day (by her carry I mean me, I am there to help!). She has more traditional tastes than I do, and this is awfully mod, so I need to keep looking.

I LOVE this print, I just don't know who for....


So many options, ahhh!

For Melissa, I know what colors I'm looking for. For my sister Alli, I'd like to find a really modern print with apples on it (she loves apples and they're kind of Orla Kiely-esque). If not, something in a coral color. She likes the really modern graphic stuff like I do. For my sister Mary....something with donuts on it would be funny (that girl really, really loves her donuts) but I don't want it to look kitchsy. I'll need Alli's help on that one. But for Ryan's sisters, Erin and Kate, I am drawing a blank. I don't know them well enough yet to know what colors or prints they'd like.

So what do you all think? Would tote bags with a matching/coordinating make-up bag/camera case/pouch for whatever be too Holly Hobby/Susie Homemade/Cheap? Be honest! I know that I would LOVE something like this (I hoard canvas bags, because I use them for everything, groceries, trips to the library, lunch bags, etc.) and I love to have little pouches to organize things in my purse. But while I appreciate a homemade gift, not everyone does, and I get that. Any ideas on fabric for his sisters? What are you doing for you attendants gifts?

Wednesday, January 6, 2010

Garter Material

*Ryan, this concerns the garter which I know you'd like to be surprised about, so read no further please*

I was in St. Louis last week when I was laid off from work, and I made it to this amazing fabric store called Jackman's Fabrics. This place is like Mood from Project Runway or something, the selection was incredible.

I posted about a lovely garter I'd like to model mine after here, and I've been on the hunt for dotted swiss tulle. I hadn't been able to come close anywhere, not even online, but I knew I'd be able to find something at Jackman's. They have a really large selection of bridal trim, lace and fabrics, and now I know why lace dresses cost so much-they had some lace there that was $65 a yard! Anyway, they had this lovely sheer fabric that I think will work nicely:


It was $9/yard, and I got a half yard, which is wayyyy too much fabric, but I've never made a garter before or worked with elastic and I wanted to leave myself plenty of room for error.

I am doing the garter in the colors of a running team Ryan is on with some of his running friends. The team is called "Omega Falcon" and their colors are blue and orange. (Don't worry, they all have nicknames that go on their singlets...most of them have ninja names.) I want to incorporate the name Omega Falcon in there somehow, and I was thinking a personalized tag or something, but they are expensive, and you have to order a bunch. I might look into embroidering the name on the ribbon, which sounds really tricky. Or maybe I could get a piece of satin and cut it into a strip, hem it, and embroider on that.

Hopefully I can get on it this weekend, depending on if Ryan comes down or not. I just need to get some ribbon and/or satin, coordinating thread and elastic and I'll be good to go. Now that I have a kick *ss sewing machine, this should (hopefully) be a fun project!

Are you sewing anything for your wedding, or learning new skills?

Tuesday, December 15, 2009

How to Cover Not-Especially-Attractive Bouquet Holders

With feather plumes!


I LOVE this. Love it, I think the feathers are such a great subtle touch. Now I just have to stalk them until they go on sale, because they are $3 per feather. Even on sale they're still $1.50 per feather. Insanity! But anyway, I couldn't be happier with the results. What do you all think?